Take a scroll through your phone, and then your computer. How many apps, platforms, and websites do you interact with on a daily basis? How many of those sites require you to use images in some capacity? If you’re like me, that list is fairly long. There are social platforms, personal and professional websites, email applications, and the occasional print job.
All of these platforms and use cases have different image requirements and specs. Some (like a website) require images with small file sizes and fast load times, while others (like a print brochure) need super high-definition images with high DPI values.
But, unless you’re a professional photographer or creative, chances are you’re not always going to have the exact right size of image for each potential use case. When that problem arises, it helps to have tools in place that allow you to quickly resize existing images so that they’re usable in the destination format.
This is what image upscalers solve. They allow you to take an original image—captured from a phone, for example—and increase its size and resolution so that it’s usable in, say, print. Historically, you’d have to rely on heavy-duty software like Photoshop. Not anymore.
There are dozens of image upscaler applications and software on the market today. So many, in fact, that it can be hard to choose the right one for your needs. This article will help with that.
We’re going to profile five tools that we consider to be the best AI image upscaler in 2025. I’ll share what’s unique, great, and not so great about each one, plus some personal observations from trying them out.
This will include:
Top 5 image upscalers in 2025
At a glance
| Tool | Platform | Key features | Pricing | Pros | Cons |
|---|---|---|---|---|---|
| Photoroom AI Upscale | Web, Mobile (iOS & Android) | Generative AI upscaling up to 4K, batch editing, additional tools like background removal | Free; paid starts at $4.99/week | Easy to use, batch editing, high-quality generative AI upscaling, supports team collaboration | Premium feature gated behind Pro plan, no desktop offline editing option |
| AVCLabs Photo Enhancer | Desktop (Mac & Windows) | Deep learning upscaling, sharpening, noise removal, face refinement, upscales up to 400% | Free trial (with watermark), paid starts at $19.95/month | High-quality upscaling, easy to use with presets, supports multiple image formats | Slow processing for large images, desktop-only, resource intensive, watermark in free version |
| PhotoDirector | Desktop (Mac & Windows) | AI upscaling up to 4x, full photo editing suite, customizable export settings | Free trial, $134.99/year for PhotoDirector Suite 365 | Extensive editing tools, suitable for beginners and professionals, internal image library | Premium subscription required for advanced features, no bulk editing capability |
| Upscale.media | Web, Mobile (iOS & Android) | Quick and simple upscaling up to 4x, removes pixelation and artifacts, web-based | Free; paid starts at $19/month for 100 credits | Very user-friendly, fast processing, no installation required, supports multiple formats | Limited customization, lacks advanced features, free version limited to 3 lifetime upscales |
| HitPaw Photo Enhancer | Desktop (Mac, Windows), Mobile (Android) | Upscaling up to 800%, multiple AI models (denoise, face enhancer, colorizer, sharpener) | Free trial (with watermark), paid starts at $51.99/month | Powerful AI models for various use cases, batch processing, high compatibility | No web interface, watermark in free version, requires high-end PC for best performance |
1. Photoroom AI Image Upscale
First on our list is Photoroom’s AI Upscale tool—one of a suite of high-powered photo editing tools.
What’s unique about Photoroom’s AI upscaling tool is the technology and process. Instead of just copying and averaging out pixels in the image, as other platforms do, the AI Upscale tool uses advanced AI algorithms to create entirely new pixels based on the surrounding information in an image. That’s thanks to the addition of generative AI in the upscaling workflow.
This means that, instead of losing pixels as the image is enlarged, the tool creates new pixels to ensure that the original quality, context, and sharpness of the image are maintained and enhanced—regardless of the size.

Here are some specs for Photoroom’s AI Upscale tool:
Availability: web application and mobile apps on iOS and Android.
Input file types: PNG, JPEG, WEBP, HEIC
Export file types: PNG, JPEG, WEBP
Ideal users: Designed for small business owners, creative business owners, content creators, and enterprises that want a visual creative assistant for elevating their photography.
Pros
An easy-to-use tool that allows you to enlarge images to 4K resolution using generative AI in just a few clicks or taps.
Photoroom’s AI Upscaler will work with even the smallest resolution file, enlarging images to sizes that would previously be very difficult to replicate on other platforms.
Photoroom also offers a suite of other photo editing tools like the ability to expand an image beyond its original frame through AI-driven outpainting, remove people and objects from an image, add text to your image, remove image backgrounds and replace them with Gen AI-created settings.
The platform also offers batch editing, which allows you to edit multiple photos at once on mobile or web. Businesses can also benefit from Photoroom API for mass photo editing, up to thousands per month.
Cons
While Photoroom is available on the web, it isn’t available as desktop software, which might be a limitation if you want to edit offline on your PC.
The AI Upscale tool is a premium feature, which limits experimentation. However, you get a free trial on the pro plan and you can experiment with the tool within that window.
How much does Photoroom cost?
Photoroom offers a free trial to all users. The following prices apply after the trial period:
Pro | Max | Ultra | Enterprise |
$7.50 per month/billed annually | $20.99 per month/billed annually | From $82.50 per month/billed annually | Contact the sales team for customized prices. |
You can find more information about what each plan includes on the dedicated pricing page.
How to use the Photoroom AI Upscale tool
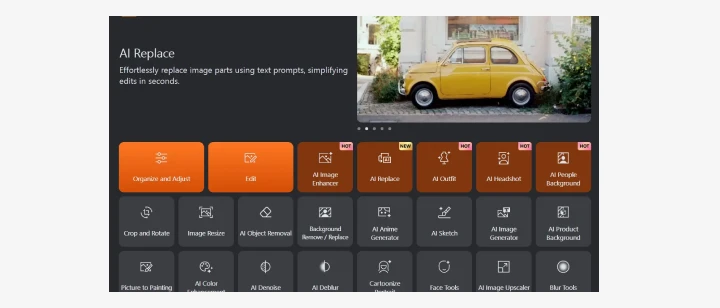
Open the Photoroom app, select All tools and click Upscale.
Upload your image and choose Enhance, Transform, or Reimagine based on what you want to achieve. Then click Upscale and wait a few seconds to a minute for the tool to work on your image.
Click Done once the process is complete.
Click Export to download your image.

Here's the final result compared to the original image.

2. AVCLabs Photo Enhancer
AVCLabs Photo Enhancer is part of a full suite of AI-powered photo enhancer tools developed by Anvsoft Inc. Each tool works together to give users full-scale editing capabilities. This includes image upscaling, noise removal, and face refinement.
AVCLabs uses deep learning technology—called their Super Resolution algorithm—to upscale, sharpen, and denoise images without losing the original information. This also includes the ability to sharpen blurry images, and adjust brightness, saturation, and contrast.
Users can choose to upscale their images by 100%, 200%, 300%, or 400%, without losing the original content or quality. This includes the ability to upscale resolutions to HD or 4K.

Here are some specs for AVCLabs Photo Enhancer:
Format: Desktop application for Mac OS or Windows
Input file types: JPG, JPEG, PNG, BMP, JFIF, WEBP
Export file types: JPG, JPEG, PNG, BMP
Ideal users: Ideal for creatives, studios, agencies, etc., who work on PC and/or Mac. Not great for casual users and small business owners with limited time and resources.
Plan option: Free and paid plans
Cost: Free trial (with watermark on output photo). Paid plans start at $19.95 per month, $79.95 per year, and $159.90 for a lifetime plan.
Pros
Very user-friendly and intuitive. Once the application is launched, editing a photo starts with a simple drag and drop into the application or via the “Browse” button. Preset upscaling settings are available, along with a “Preview” mode to view the image enhancement.
High-quality image upscaling. The tool produces very high-quality upscaled images, and includes the ability to adjust color, sharpening, and deblurring all in the same app.

Cons
It can be slow. Larger images with higher upscaling requirements can take minutes to process and export.
Desktop only. As a desktop software, users have to download and install an application to their computer. It’s also fairly resource intensive, requiring a decent-quality computer to perform editing tasks.
Hardware and software requirements. The platform has a list of minimum tech specs that it requires to run. Casual users with more basic processors, GPUs or graphics cards might find the program slow and clunky.
Watermarks. The free version slaps a large watermark across your export image. Users must pay a licensing or subscription fee to remove the watermark.
How to use it
Navigate to the AVCLabs Photo Enhancer web page and download the installer for Mac or Windows
Follow the prompts to install the application on your computer
Open the software on your computer
Click the “Browse” button to important photos, or drag and drop photos into the program directly
In the right panel, choose the AI model you want to use and select the upscale photo size. Options include: 100%, 200%, 300%, or 400%
Make further adjustments to the image, if required, and click the eye icon to preview the image before saving
Click “Save All” to start processing the photo
The new image will save automatically to your computer for use

Personal observations
When using AVCLabs Photo Enhancer API, I kept our grading criteria in the back of my mind. Specifically, ease of use, ease of access, and quality of output.
Overall, I thought the tool’s upscaling capabilities and export quality were fantastic. It gets the job done, and the edited image was certainly of a higher quality. The platform is also very easy to use, and the presets make upscaling the image foolproof.
I’m not a big fan of having to download and install a desktop program on my computer for this type of task. It eats up a lot of time and resources compared to more readily accessible apps or web-based platforms. It did take a minute or two to process the images that I upscaled, verifying some complaints about processing time.
I would also like to have the ability to see the projected file size when working through the various upscaling options so that I know what I’ll have to work with after export.
3. PhotoDirector
Cyberlink PhotoDirector offers a full suite of image editing tools, as shown below. One such tool is the AI Image Upscaler. Like Photoroom, Cyberlink’s suite is a full-fledged photo editor ecosystem that caters to a wide array of creative needs.
The AI Image Upscaler, in particular, allows users to magnify and enlarge their images by up to four times their original size, without quality loss.
 Here are some specs for PhotoDirector:
Format: Desktop application for Mac or Windows
Input file types: JPEG, PNG, BMP, GIF, TIF and RAW formats like Canon RAW (.CR2, .CR3) and Nikon RAW (.NEF, .NRW)
Export file types: JPEG, PNG, BMP, GIF, TIF
Additional features: Ability to customize export settings for photos, including their resolution, image quality, file size, and color profile
Ideal users: Suitable for beginners all the way up to professional editors. As a desktop application, it’s ideal for creatives, studios, or agencies who regularly work on PCs or Macs. Because of that, it may not be great for casual users or small business owners who spend less time on desktop computers and need to be able to edit on the go.
Plan options: Free trial or subscription
Cost: Free trial. $134.99 per year for the PhotoDirector Suite 365, which includes all tools, content packs, and 100GB of cloud storage. Lifetime pricing starts at $99.99.
Pros
Extensive range of editing tools beyond image upscaling. This includes AI backgrounds, image enhancers, object removers, background removal, denoise, deblur, and more.
User-friendly interface with advanced features available, making it suitable for beginners and professionals.
Internal image library that allows users to upload and manage bulk file folders for editing in one place. This includes the ability to tag, categorize, and sort files.
Cons
Access to more advanced features requires a premium subscription
AI Image Upscaler is considered to be a premium feature, meaning free trialists can’t experiment to determine if its the right tool for them
No ability to edit images in bulk—one-by-one editing is required (however, there is the photo library that makes it easier to access those images)

How to use it
Download and install the application to your computer
Run the program
You’ll be brought to a menu screen (shown above) with all of the different tools available to you
Select “AI Image Upscaler.”
Drag and drop an image or click “Import Photo”
This will load the image into the Photo Upscale, where you can choose to enhance the size of the image from 1x to 4x
Unfortunately, you need a Premium subscription to go any further
Personal observations
The fact that the AI Image Upscaler was gated behind a subscription made it a bit difficult to judge the overall quality of this tool. However, I will say that it appears to offer a similar level of quality and customizability as AVCLabs.
Like with AVCLabs, however, I was not a big fan of having to download, install, and run a desktop software to access the tool. Many more casual users or small business owners who need quick and easy access to their image upscaler would likely agree.
Overall, though, the tool was easy to use and did exactly what it advertised. It’s a great option for anyone looking for a slightly more advanced suite of AI photo editing tools than you’d get with a simple web-based upscaler. It certainly has the tech and specs to give you a high-quality upscaling experience.
4. Upscale media
Upscale media is a web and app-based image upscaler tool from Pixelbin.io. This tool falls into the quick and easy-to-use category, and is more of a no-frills solution than the two platforms mentioned previously.
The best thing about Upscale.media is that it offers a very straightforward approach to AI image upscaling. You navigate to a web page or an app, upload an image, and it generates an upscaled version for you. No need to download a desktop application.
Upscale.media is able to upscale images to 4x their original quality. It offers an additional AI feature at export that simultaneously polishes the image by removing pixelation, blur, noise, and any other artifacts that harm image quality during upscaling.
 Here are some specs for Upscale.media:
Format: Web browser or mobile app for iOS or Android
Input file types: PNG, JPEG, JPG, WEBP, HEIC, BMP
Export file types: PNG, JPEG, JPG, WEBP, HEIC, BMP
Ideal users: This is a great tool for users who need to occasionally upscale images. It’s a simple solution, and great for users who prioritize speed, convenience, and simplicity. This could be a strong option for casual users and small business owners who want an easy and reliable solution, without the extensive features of a full editing suite.
Plan options: Free version. Monthly plans with set numbers of upscale credits. Pay as you go. Enterprise options.
Cost: Free (one-at-a-time editing and up to three lifetime upscales). Monthly plans start at $19 for 100 credits. A one-time payment offer starts at $19 (45 credits). Enterprise options are available by contacting sales.
Pros
User-friendly and easy-to-access web tool or mobile app
Very simple to use—no fuss or playing around with settings
Automated upscaling process—delivers high-resolution images up to 4K
Removes lossy JPEG artifacts—visible distortions or evidence of compression that may have occured—at processing to enhance image quality effectively for a broad range of uses
Processes images within seconds, without extensive stress on your computer or device
Cons
Lacks the extensive editing features of more robust platforms
Free users only have access to one feature from Pixelbin.io
Users need to pay the monthly subscription to access the full suite of editing tools from the company, which still lacks compared to some other platforms on this list
Limited ability to customize settings in the image upscaler (i.e., file size, resolution, etc.). It’s very much a templated 1x to 4x solution with minimal customization
You can’t preview or compare your imported image to the upscaled one
How to use it
Instructions for the web:
Navigate to Upscale.Media
Click “Upload Image” and select a file from your computer
The platform automatically processes the image
Once processed, you have the ability to select whether to upscale from 1x to 4x
You can also toggle “Enhance Quality” on and off
This is an AI tool that enhances the image by removing artifacts, balancing sharpness and softness, and preserving the natural look and feel of the image
The mobile application functions in the same way. Download the app from the App Store or Play Store and follow the same workflow as above.

Personal observations
Upscale.media comes across as a great tool for very basic, one off upscaling tasks. It does the job quickly, and gets you on your way without much headache or tinkering.
The interface on both the web and application is very basic. That’s great for people who want an easy-to-use tool to do a very specific task. It’s not great for users who want a little more control over their images and output.
For small business owners and individuals who want to take greater control over their image editing and outputs, I’d recommend a slightly more robust tool that allows you to customize output. I would also recommend tools that include additional editing capabilities to help you further manipulate and enhance your image.
Upscale.media does one thing well. And that’s great. But other AI photo editing tools, like Photoroom, can do a bit more to help with your overall editing needs.
5. HitPaw Photo Enhancer
HitPaw Photo Enhancer is a desktop and app-based image upscaler, available for Mac, PC, and Android devices that’s capable of upscaling images to 800% of their original size and quality.
Built into its image upscaler tool are several AI models that are designed for various types of images and settings. These include:
Denoise (automatically remove noise from high-ISO and low-resolution images)
Face enhancer (for portraits)
Colorizer (bring old black and white photos to life)
Color correction (for images with color or low-light issues)
Image sharpener (for blurry or poorly focussed images)
HitPaw is more in line with AVCLabs or PhotoDirector in that it’s a more powerful, primarily desktop-based application with various photo editing capabilities.
A big win for HitPaw is that the free version also allows you to process multiple images in bulk.

Here are some specs for HitPaw:
Format: Desktop software of Mac or PC, plus an Android app
Input file types: PNG, JPG, JPEG, WEBP, TGA, BMP, JFIF
Export file types: PNG, JPG, JPEG, WEBP, TGA, BMP, JFIF
Output resolution: Images upscale to HD, 2K, 4K, or 8K
Ideal users: HitPaw is ideal for users who are seeking an all-in-one solution for photo upscaling and enhancement. This includes small business owners and casual users who need a reliable image upscaler for single or batch edits.
Plan option: Free trial. Subscription. Perpetual license. Business plan.
Cost:
Free trial
Paid plans starting at $51.99 per month (occasionally discounted)
$169.99 per year (occasionally discounted)
$229.99 perpetual license
$406.99 per year business plan
Multi-user controls
Volume discount
Pros
Compatible with all major types of image files (both input and output)
Suitable for various type of photos, including landscapes, portraits, and anime
Powerful AI image upscaler alongside other image editing tools in one platform
Easy to use and available on multiple platforms
Multiple output formats for progressively high-resolution images
Capable of upscaling images by up to 800%, only takes a matter of seconds
Cons
Free version exports images with watermarks
Free version is limited—uses need the subscription model for more advanced features
No web interface for quick edits on the fly (although there is a mobile app)
How to use it
Open the desktop application
In the left toolbar, select AI Enhancer
Drag and drop your image(s) or click “Choose Files”
From here, you’ll be given a range of options to enhance images
Choose your desired AI Model—select based on your image type to improve the quality of the enhancements
Select a resolution from 100% to 800%, or customize to a specific size
Click “Preview” to see the effects of the enhancements on your image

A major differentiator compared to others in this list is the many customizations you can make by clicking the “Gear” icon in the bottom right corner.
Here, you can make changes to the export format, export DPI, keep Exif data about the photo and generally improve the performance of the processing with various computer settings.
Uploading multiple images at the same time follows the same workflow as above.
When it comes time to selecting the desired resolution, there’s an option to “Apply Current Settings to All”.
This will ensure that all images in your upload list receive the same AI upscaling treatment.
Personal observations
My overall impression of HitPaw is that it’s both easy and intuitive to use, and powerful in its image upscaling abilities. I was a fan of the level of customization available for export settings, image sizing, and file size.
Speed was another noticeable factor. Even when scaling images to 800%, the processing was fast, without extensive resource usage.
Overall, I would consider this to be a great desktop option for small business owners and individuals who need a high-powered and scalable AI image enhancer for one or batches of image files.
The only drawback comes from the lack of web application, which requires you to either process images on your desktop or through the app. This isn’t a deal breaker, but does reduce some of the convenience that more casual, on-the-go users might be seeking.
What is image upscaling?
Image upscaling is the process of making a photo bigger, without losing any of the original quality.
A bigger image, in this context, refers to both an increase in the resolution—i.e. adding more pixels to the image—and its physical dimensions. An upscaled image is both physically larger, and has a higher image resolution or DPI (dots per inch) value.
With a typical image enlarging process—like simply stretching the image—the photo will begin to show signs of pixelation and an overall loss of clarity. Image upscaling retains quality as the image size increases. That’s the key difference.
The reasons for upscaling an image are varied. Users might only have one copy of an original image but need to use it on a larger screen or for print purposes. Upscaling allows the user to increase the size of the image to the desired format while still retaining the original quality. In some cases—and through some upscale tools—that image quality can even be increased to meet specs for a specific media format (i.e. 4K or 8K resolutions).
Some use case examples include:
Upscaling a social media image for display on a 4K presentation screen
Upscaling a website image for use in a print brochure
Upscaling a photograph for display on a large screen at a conference or gallery
Traditionally, image upscaling has been quite a painstaking process. Users would have to open a platform like Photoshop and spend potentially hours of time on painstaking manual edits. As technology has evolved, an AI has entered the world of photography, these tools have become smarter and faster at image upscaling.
Modern image upscalers, like the ones we’ll profile in this article, use AI to power traditional upscaling techniques. This means that once complex photo editing tasks can now be done automatically and in a manner of seconds. And, it means that users can lean on low-cost, but high-powered editing solutions to tackle their upscaling needs.
Criteria for evaluating AI image upscalers
Everyone is going to have their own requirements from an upscaler tool. Some, like professional photographers and creatives, will want a high-powered platform with significant room for customization. Others, like small business owners and more casual users, will want a tool that’s easy to use and fast but gets the job done reliably with little fuss or errors.
What we looked for in this platform comparison was a balance between the two. We like a tool that does its job really, really well. But it also needs to be easy-to-use and versatile enough for a wide range of different users.
Here are some of the general criteria that we took into account when selecting the list of image upscalers as “the best” in 2025:
Format. Is the tool available only on the web? Only desktop? Mobile? Or is it cross-platform compatible?
Ease of access vs. power. How easy is the tool to access and use? How powerful is it? We’re looking for a strong balance between those two factors.
Export formats. What file types can the image upscaler process? Does it work with all major formats that a professional to casual audience would need?
Customization of exports. Can users customize and manually balance export file size and image size to meet their exact needs? Or does the tool box users into preset export formats?
Quality of upscaling. How well does the tool do its main job? How much can the users enhance image quality by?
Speed. How quickly does the tool process upscaling jobs? Can it process multiple images at once, or do users have to edit and export images one-by-one?
The image upscalers mentioned in this guide balance the above criteria differently. Some are high-powered desktop solutions while others are web or mobile app-only. Our goal was to pick out the best AI image upscalers and present you with the pros and cons of each to help you make an informed decision.
How to pick the right AI upscaler
The right image upscaler depends entirely on your needs and the frequency at which you’ll use the tool.
In general, I would recommend looking for an image upscaler for work that has the right mix of:
Feature extensibility
File customization
Mobile, web, and desktop compatibility
Speed and accuracy of upscaling
Ability to scale up to very high qualities and file sizes
Affordability for the breadth of features
The ability to easily edit images in bulk
All the tools outlined in this article have free options available. I highly encourage you to try each one to see which resonates best with you and your needs. The AI editing landscape is changing drastically, with tools evolving and new entrants to the market emerging rapidly. Experiment with these tools to find the one that works best with your needs.
FAQs about image upscaling
What is upscaling an image?
Upscaling an image means increasing its resolution and physical size, without losing any of the quality of the original image.
How do I upscale an image without losing quality?
The best way to upscale an image without losing quality is to use an AI image upscaler like Photoroom, AVCLabs, PhotoDirector, Upscale.media or HitPaw. These tools are able to increase image sizes, quality, and image resolution, without losing the original quality or context.
Related articles