To standardize clothing photos across a large SKU catalog, fashion retailers can use AI ironing. Photoroom's AI Ironing API sits on the same Image Editing API as Ghost Mannequin and Flat Lay, so your team fixes creased garment photos as a catalog step and checks each output before it goes live.
Garments arrive from factories, storage, suppliers, or shipping with packing creases, bunching, and wrinkles that make your product photos look unpolished. So your team steams and reshoots each garment, or retouches supplier images.
However, steaming, reshoots, and manual retouching each fix the problem slowly or at a high cost. Steaming requires the physical garment; reshoots add studio, model, photographer, and coordination costs; manual retouching is slow, expensive, and hard to apply consistently across thousands of SKUs and frequent catalog updates.
AI ironing solves this scale and speed problem for retailers by removing wrinkles and creases from clothing photos automatically. Photoroom's AI Ironing API standardizes garment condition at scale as one step in your catalog workflow, before your Ghost Mannequin and Flat Lay edits.
This guide covers what AI ironing is, how it works in a catalog workflow, what to check before an AI-ironed image goes live, and where to start.
What is AI ironing?
AI ironing is the use of AI solutions to detect wrinkles in clothing images and smooth them, so the garment looks freshly pressed without anyone steaming it.
With Photoroom's AI Ironing API, retailers can process a single photo or an entire catalog automatically. You send a garment photo and get the same photo back with the fabric smoothed, whether your team shot the photo or a supplier did.
Why do fashion retailers use AI ironing?
Fashion retailers use AI ironing to make product photos look freshly pressed without physically steaming or reshooting every garment. It removes wrinkles and creases digitally, helping listings look cleaner and launch faster.
AI ironing provides the following benefits to retailers:
Faster product launches: Creased samples no longer wait for a steamer or manual retouching before your team can list them online.
Lower production costs: Your brand pays for fewer reshoots, less steaming, and less repeated image editing across large catalogs.
More consistent product photos: Every product page shows a neat, pressed garment, so your catalog looks like one brand.
Better merchandising: Clean product images make fabric, color, cut, and details easier for shoppers to assess before they buy.
AI ironing should improve how a garment looks without changing the garment itself. The print, seams, texture, and silhouette should be true-to-life in the edited image. Because the edit can introduce alterations to the garment, your team should always check each output before it goes live.
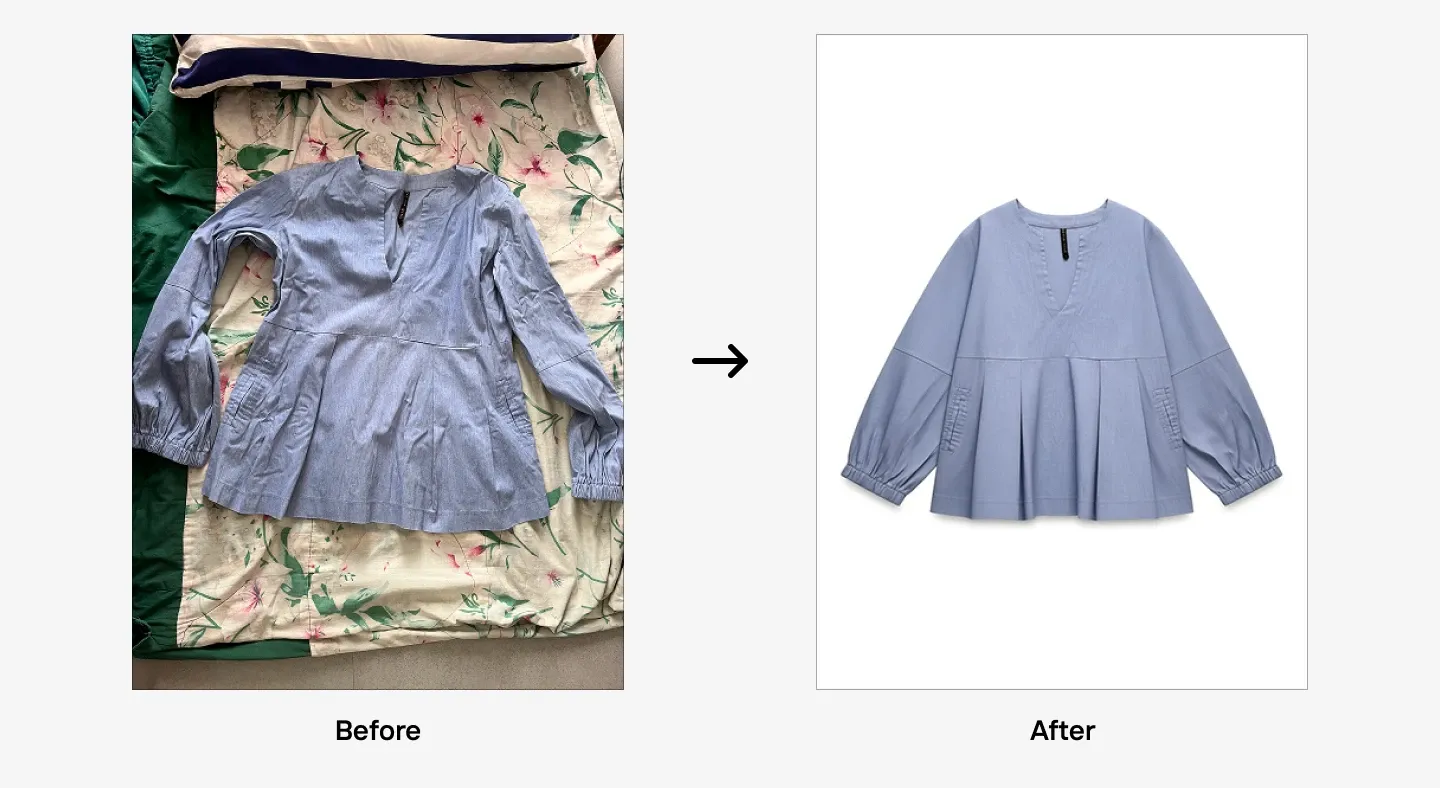 The same garment photo before and after Photoroom’s AI Ironing API removes the wrinkles.
How do I standardize clothing photos across a large SKU catalog?
To standardize clothing photos across a large SKU catalog, establish consistent photography specifications, apply the same editing rules across images, and use an AI ironing API to correct garment conditions at scale.
Here's what that process covers:
1. Establish consistent photography guidelines
Create a standard image specification that every photographer, supplier, and editor must follow. Define the background, aspect ratio, framing, lighting, camera position, and required product views. Include garment preparation instructions, such as steaming clothes, removing lint, and arranging collars, cuffs, and hems neatly.
Document these requirements in a shared photography guide so that images from different studios and suppliers follow the same visual standards.
2. Standardize garment condition with AI ironing
Even with consistent photography guidelines, garments can arrive with different levels of wrinkles and creases due to storage, shipping, and handling. Steaming and manual retouching can correct these differences, but applying them individually across thousands of SKUs is time-consuming.
Photoroom's AI Ironing API automates wrinkle and crease removal from clothing images. You can integrate it into your digital asset management (DAM) system and existing image workflows to apply consistent garment-condition corrections across large image collections, including supplier photos and existing catalog images.
Here's how AI ironing compares with steaming and retouching across a large catalog:
| Criteria | Steaming or reshooting | Manual retouching | AI ironing |
|---|---|---|---|
| Works at catalog scale | No, each garment needs studio time | No, each photo waits in a retouching queue | Yes, your developer can send many photos to the API at once |
| Gives every photo the same edit | No, results depend on who steams or reshoots the garment | No, results depend heavily on editor skill | Yes, the same edit applies to every photo |
| Fits an automated workflow | No, it's a physical step before the camera | No, a retoucher edits each file by hand | Yes, it's one API call in your existing workflow |
Of the three methods, only AI ironing as a workflow step applies the same edit to every garment photo reliably, including images your team never shot. AI ironing makes fabric smoothing part of your image guidelines, so it no longer depends on which team member is available.
3. Define quality standards for the finished images
Images should retain the details that help shoppers assess the actual product.
Establish quality checks for:
Garment accuracy: The edits shouldn’t alter logos, prints, patterns, seams, buttons, and other product details.
Fabric appearance: Natural texture and drape stay visible after editing.
Garment condition: Remove distracting wrinkles and creases without making the clothing look artificially flat.
Image consistency: Keep background, framing, crop, and lighting consistent across the catalog.
Test the workflow on representative garments and fabric types before applying it to the full catalog. Review the results against approved product references to identify any unwanted alterations.
4. Automate the process across your catalog
Once you’ve established the photography specifications and quality standards, build them into a repeatable image-processing workflow. Group images by SKU, colorway, garment type, or fabric category, then apply the relevant corrections and quality checks in batches.
A standardized workflow should cover:
Image capture and supplier image ingestion.
Background, framing, and color normalization.
AI ironing and other required image corrections.
Quality checks against approved product references.
Final image formatting and publishing.
One workflow for every image source makes it easier to maintain consistent presentation across new product photography, existing catalog images, and the images you receive from multiple suppliers. It also gives your team a repeatable process you can scale as your SKU count grows.
How does an AI ironing API work in a catalog workflow?
In a catalog workflow, an AI ironing API removes wrinkles from each garment photo before it goes to visual production such as Ghost Mannequin or Flat Lay, through one call per photo to Photoroom's AI Ironing API. Your team irons the photo, sends it on to Ghost Mannequin, Flat Lay, or background removal with the same API key, and reviews the finished image before you publish it.
1. Send each garment photo to the AI Ironing API
Pull garment photos from your studio intake, supplier feeds, and existing catalog in your DAM. Each API call irons one photo, so to process a season's intake, your developer sends many calls at once instead of queuing them one after another.
The AI Ironing API accepts and returns these files:
Formats: PNG, JPEG, WEBP, or AVIF.
File size: Up to 30 MB and 5,000 pixels on the longest side.
Output: The ironed photo comes back at about 2K.
You can test the edit on your own garment photos before anything goes live. Sandbox mode gives you 1,000 free watermarked calls a month, and the AI Ironing docs give your engineering team the request details.
2. Pass the ironed photo to Ghost Mannequin or Flat Lay
Use AI ironing to iron each photo before it goes to Ghost Mannequin or Flat Lay, because Flat Lay doesn't remove creases on its own. If a wrinkled shirt goes straight to Flat Lay, the wrinkles will be visible to shoppers on your website.
Ghost Mannequin, Flat Lay, and background removal are separate calls on the same Photoroom API key. Your developer connects the API once and sends the calls in the order each product shot needs. For example, a shirt photographed on a table goes to AI ironing first and Flat Lay second.
Plan your output size at this step too. Ghost Mannequin and Flat Lay return 1K images by default. Output resolutions of 2K and 4K are available for Enterprise plans.
3. Return the finished photo to your DAM or PIM for review
Send the finished image back to your DAM or product information management (PIM) system against its SKU. We recommend storing the original creased photo next to it, so your reviewers can compare the two side by side to spot accuracy errors.
Keep the image off your channels until it passes review. Once your team approves it, export it to your site and marketplaces the same way you publish any other product photo.
Get a free API key and test AI ironing on your own garment photos in sandbox modeWhat to check before an AI-ironed image goes live
Before listing an AI-ironed image on your platform, check that the wrinkles from packing and handling are gone and that the garment's pleats, seams, prints, texture, and silhouette look the same as in the source photo. Compare each ironed image with its creased version, and look closer at garments where a change is easy to miss.
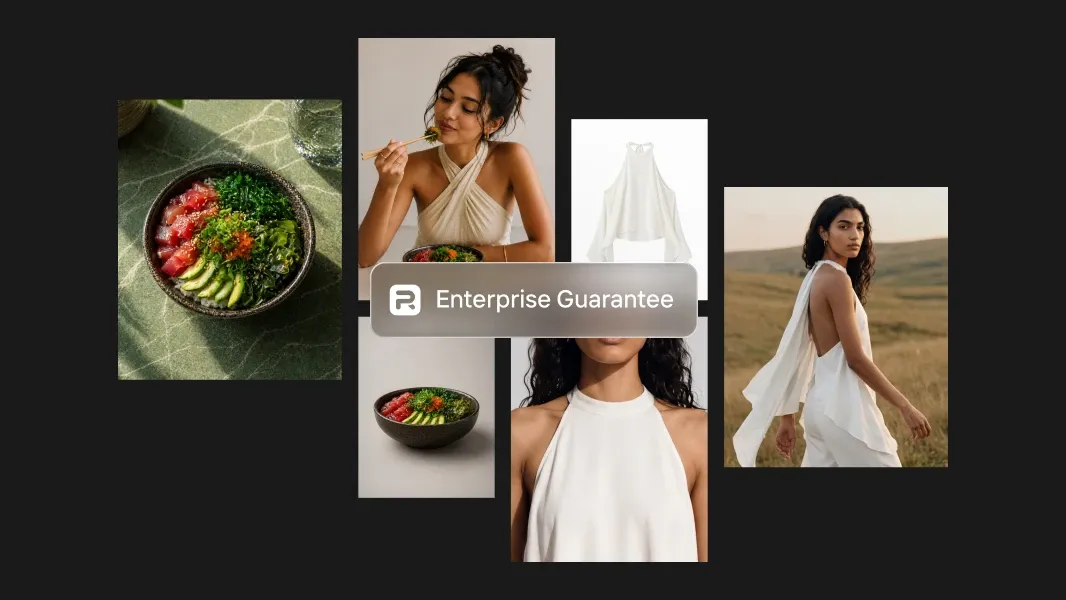
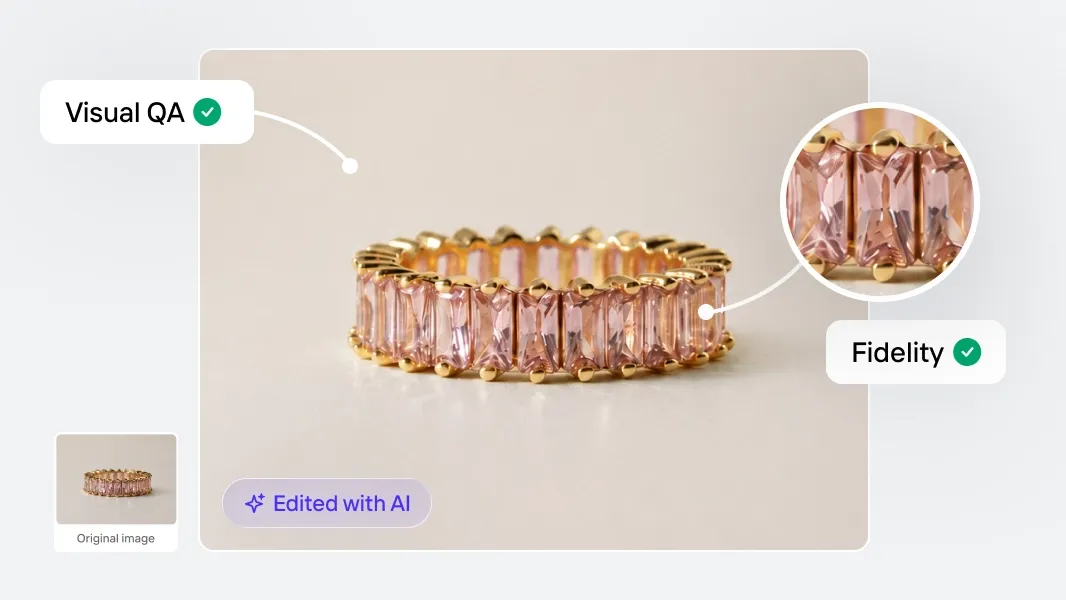
Photoroom’s Enterprise plan can automate much of this review. Visual QA scores every output for fidelity and catches the misses before they reach your customers, and Visual Agents score each edit and retry it until the output passes. Eligible fashion businesses on annual Enterprise contracts can also get the Photoroom Enterprise Guarantee, so you pay only for outputs that pass agreed fidelity criteria.
Whether your team reviews every ironed image or only the ones Visual QA flags, the standard below tells reviewers what to look for.
1. Know what ironing should remove and what it should retain
Here's what should be gone after ironing and what should stay as it was:
| Should be gone after ironing | Should look the same as the source photo |
|---|---|
| Fold lines from transit and packing | Pleats, gathers, and other folds the designer intended |
| Creases from the polybag | Seams, darts, and topstitching |
| Wrinkles across a print | The print, logo, or text on the fabric |
| Rumples on knit or linen | The natural texture of the knit or linen |
2. Compare each ironed image with the source photo
Open the ironed image next to the creased version stored in your DAM or PIM, and check the same points on every garment.
Review each ironed image for:
Silhouette: The outline, length, and fit match the source photo, with no change to sleeves, hems, or collar shape.
Seams and hems: Stitch lines are in the same position and stay straight where they were straight.
Prints and logos: Patterns and text match the source photo. For example, follow a stripe from one seam to the other to confirm it doesn't bend.
Texture: At full size, knit, rib, denim, or linen still shows its weave instead of looking flat.
Color: The shade matches the source photo and the approved colorway.
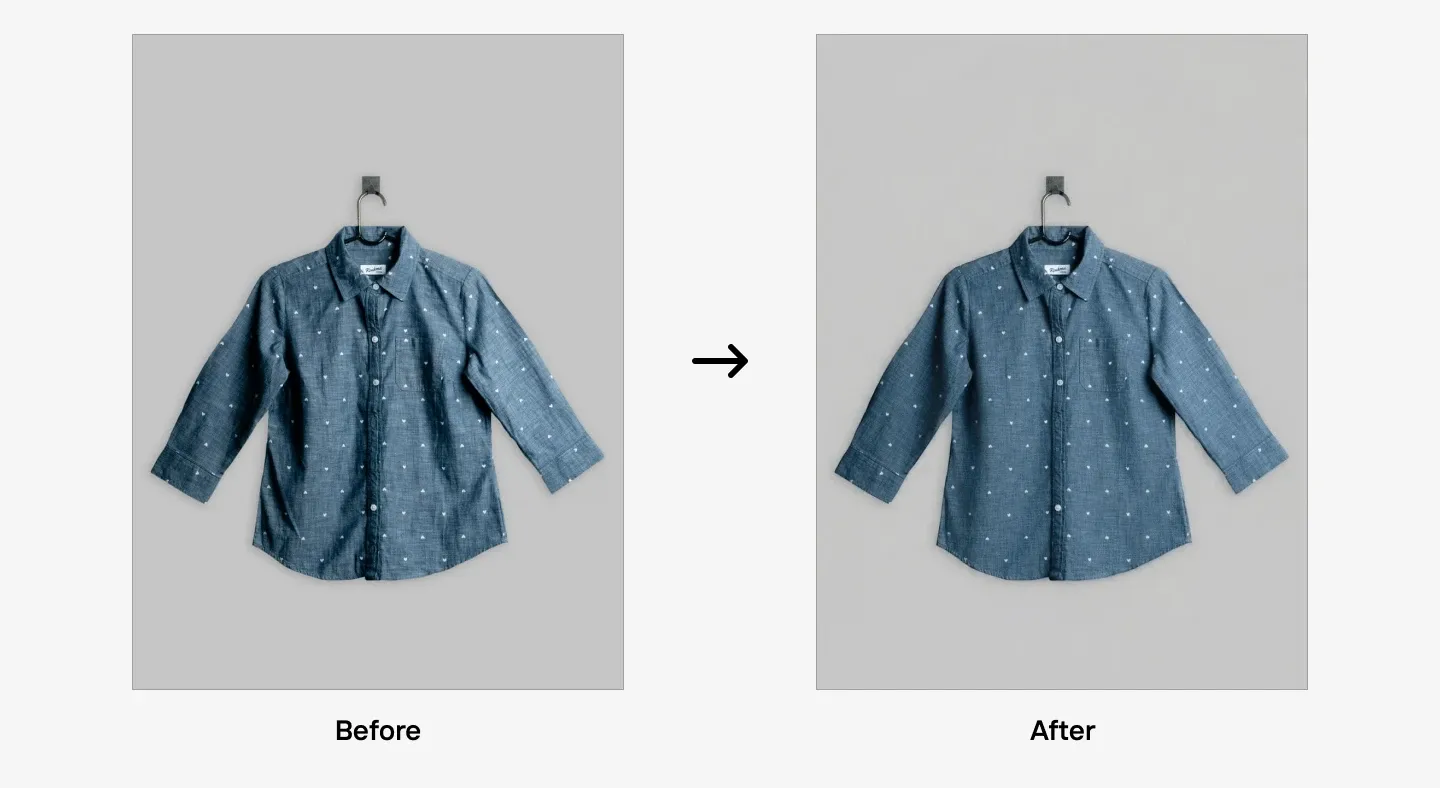 A chambray shirt before and after AI ironing. The silhouette, seams, heart print, and weave match the creased version.
3. Look closer at garments that are easy to alter
If your team reviews ironed images manually, we recommend checking every image from higher-risk groups and a sample from the rest. Higher-risk garments are the ones where a small change is hard to spot and misleads shoppers if it goes live, such as prints, stripes, logos, pleated or gathered pieces, and textured fabrics like linen, corduroy, and chunky knits. Plain basics, such as solid cotton T-shirts, need less review time.
When an image fails review, publish the creased photo, send it to a retoucher, or reshoot the garment. Log the garment type each time, so your team can see which categories fail most often and adjust how much of each group you review.
4. Check the image against Amazon and Google rules
Amazon and Google don't mention wrinkles in their image rules, but both ask for a clear, accurate view of the garment, and AI ironing helps your photos meet that bar. A pressed garment gives shoppers the clean, unobstructed view Google asks for, and the ironed photo comes back at about 2K, above the 1,000 pixels Amazon needs to turn on zoom.
However, AI ironing doesn't cover every channel rule, so check each image against the rest before it goes live.
Check each ironed image against these channel rules:
Color: Amazon's clothing image guidelines require the color in the image to match the product for sale, so confirm the shade didn't change during ironing.
Full, clear view: Google Merchant Center asks for a clean, unobstructed view that clearly shows the exact item for sale. Amazon also requires the whole product in the main image, with no part clipped.
Mannequins and folds: Amazon main images can't show folded products or a visible mannequin, hanger, or holder. Adult clothing main images also need a model, so use ghost mannequin and flat lay shots as alternate images, except in categories Amazon requires off-model, such as accessories and children's swimwear.
Background: Amazon main images need a pure white background, which background removal on the same Photoroom API key can give you.
Resolution: Ghost Mannequin and Flat Lay return 1,024 x 1,024 pixels by default, which still clears Amazon's zoom threshold. Google recommends about 1,500 x 1,500 pixels for best results, so plan for 2K output on an Enterprise plan if you want to meet it.
Where to start with Photoroom's AI Ironing API
Start by testing Photoroom's AI Ironing API on a small batch of your hardest garments in sandbox mode, then connect it to your catalog workflow once the results meet your review standard.
Here's how to get started:
Pick a test batch: Choose garments that are easy to alter, such as prints, stripes, pleated pieces, and textured fabrics, plus a few plain basics. Include photos from your studio and from your suppliers.
Iron the batch in sandbox mode: Get a free API key and use the 1,000 free watermarked calls you get each month to iron your test photos.
Review the results against your standard: Compare each ironed image with its creased version. Check that packing folds and creases are gone, and that the silhouette, seams, prints, texture, and color match the source photo. Note which garment groups need a closer look.
Connect the API to your DAM or PIM: Send each garment photo to AI ironing first, then to Ghost Mannequin or Flat Lay, and save the finished image in your DAM or PIM under the product's SKU, so it's attached to the right product.
Choose how you'll review at scale: Review by hand, checking every higher-risk garment and a sample of the rest, or move to an Enterprise plan for Visual QA and higher rate limits.
AI ironing makes clothing photos faster to produce, but at catalog scale, speed without review puts a changed print or a flattened pleat in front of shoppers. Photoroom's AI Ironing API removes wrinkles from every garment photo on the same API as Ghost Mannequin and Flat Lay, so your team standardizes clothing photos across the catalog and lists each season's garments faster.